Thursday, August 20, 2015

Faux Fur Footstool

My next project, became this Faux Fur Footstool.

 
Here is the before, in case if you missed it.
 
 
More than a year ago I bought this faux sheepskin rug that I put in my daughters nursery in front of her crib, I loved it there, but secretly I also wanted to put it on this footstool. Now after I've seen them everywhere on the web I decided I was going to do it. And we got her a replacement rug too. :)
 
So I got busy pulling it apart and now we know that this little footstool is now on its 4th life.

One fun part, and gross part, of  reupholstering a piece of furniture is that when you are taking it apart, you get to peel off the layers of its life... if you are lucky :) A lot of people will just put their new fabric on top of the old. So this little guy had 3 different fabrics. But we'll go in reverse order, because that's the way I discovered it.

First the 70's green:

Then this brick red dazzler:


And then the original, needlepoint:

 
I think it also had trim going around the perimeter because there were rusty tacks all of the way around.
 
I'm not sure how old this piece was, but this fabric was pretty old and deteriorating, I gave it a good cleaning and then got started recovering.
 
 
Now normally I'd take this and the original padding off, but because the padding inside was still good, can you believe it? I was just going to add a little more. And I was so tired of pulling out little rusty tacks. This little stool that I thought would be so simple to recover took a while to take apart.

 
 So last night before dinner I was able to do a quick restore on the wooden legs.

 This is a before and after of just the Restore-a-Finish.  After that's dry then you finish it off with the Feed-N-Wax. This is also what I did with the oak chair I recently redid. You can see it here.
 
This morning it was ready to finally recover. And I actually had some time to do it.

Is anyone else EXHAUSTED from school starting? This year I have 2 in school, but one gets out earlier so my schedule has drastically changed.


After placing the batting that I used for my extra padding on the stool I flipped it upside down onto the back of my fabric that I was reupholstering, which was actually a rug that used to be in my daughters room in front of her crib.
 Then I got my tools ready.
 So with faux fur I've heard that if you cut it, it will just fall apart and continue too. So instead of cutting you have to rip it. Well because it was a rug I hoped it would be different, and thankfully after my "test" cut above, I knew I'd be fine.

 If you are thinking of doing this the faux fur is actually really forgiving.  I hardly used half as many tacks as I usually do for something this size and you really don't have to worry about if everything looks smooth and is pulled just right, you just go for what feels and looks right. Plus the tacks become pretty much invisible once the fur covers them.
 It's ALIVE!

 This was after I secured all four of the sides, before I did around the legs. Which is the only tricky thing about this upholstery project.
 You will want to do some cutting to get rid of the extra bulk, and even though I could cut my fabric, after making a cut you need to make sure and pull off any of the extra fluff that is hanging on at the spot where you cut. But that's all of the "falling apart" that it does.
 Then you just play around with it, making sure to still hold it tight so your corners wont be baggy, until you get it how you like and then secure it with a tack.
You can see my tack here.

 And then here you can't! Like I said, most forgiving fabric I've ever reupholstered with.
 
 Here is my first finished corner.

And here is the bottom all done. And please don't mind my little helper. You gotta do what you gotta do to get anything done right?!

 And sometimes that's letting her control the music on my phone and letting her hand me the tacks. Thankfully they aren't too sharp. By the way you could definitely use a staple gun for this project but I think the tacks are much easier to hide and are more flexible if you want to change anything you've done.
 And playing peek-a-boo a million times under the table.

And then we were done! And ready to race off to the school to pick up her brother.


So what do you think? Too crazy? Look too much like a Halloween costume? Or is it Tres Chic?
To be honest now that its done I'm not sure how I feel. I love the texture it brings and the look, but I'm a little nervous of how it will "wear".

Sunday, August 16, 2015

Neighborhood garage sale

I wish I had taken pictures of everything we scored this year at our annual neighborhood garage sale.

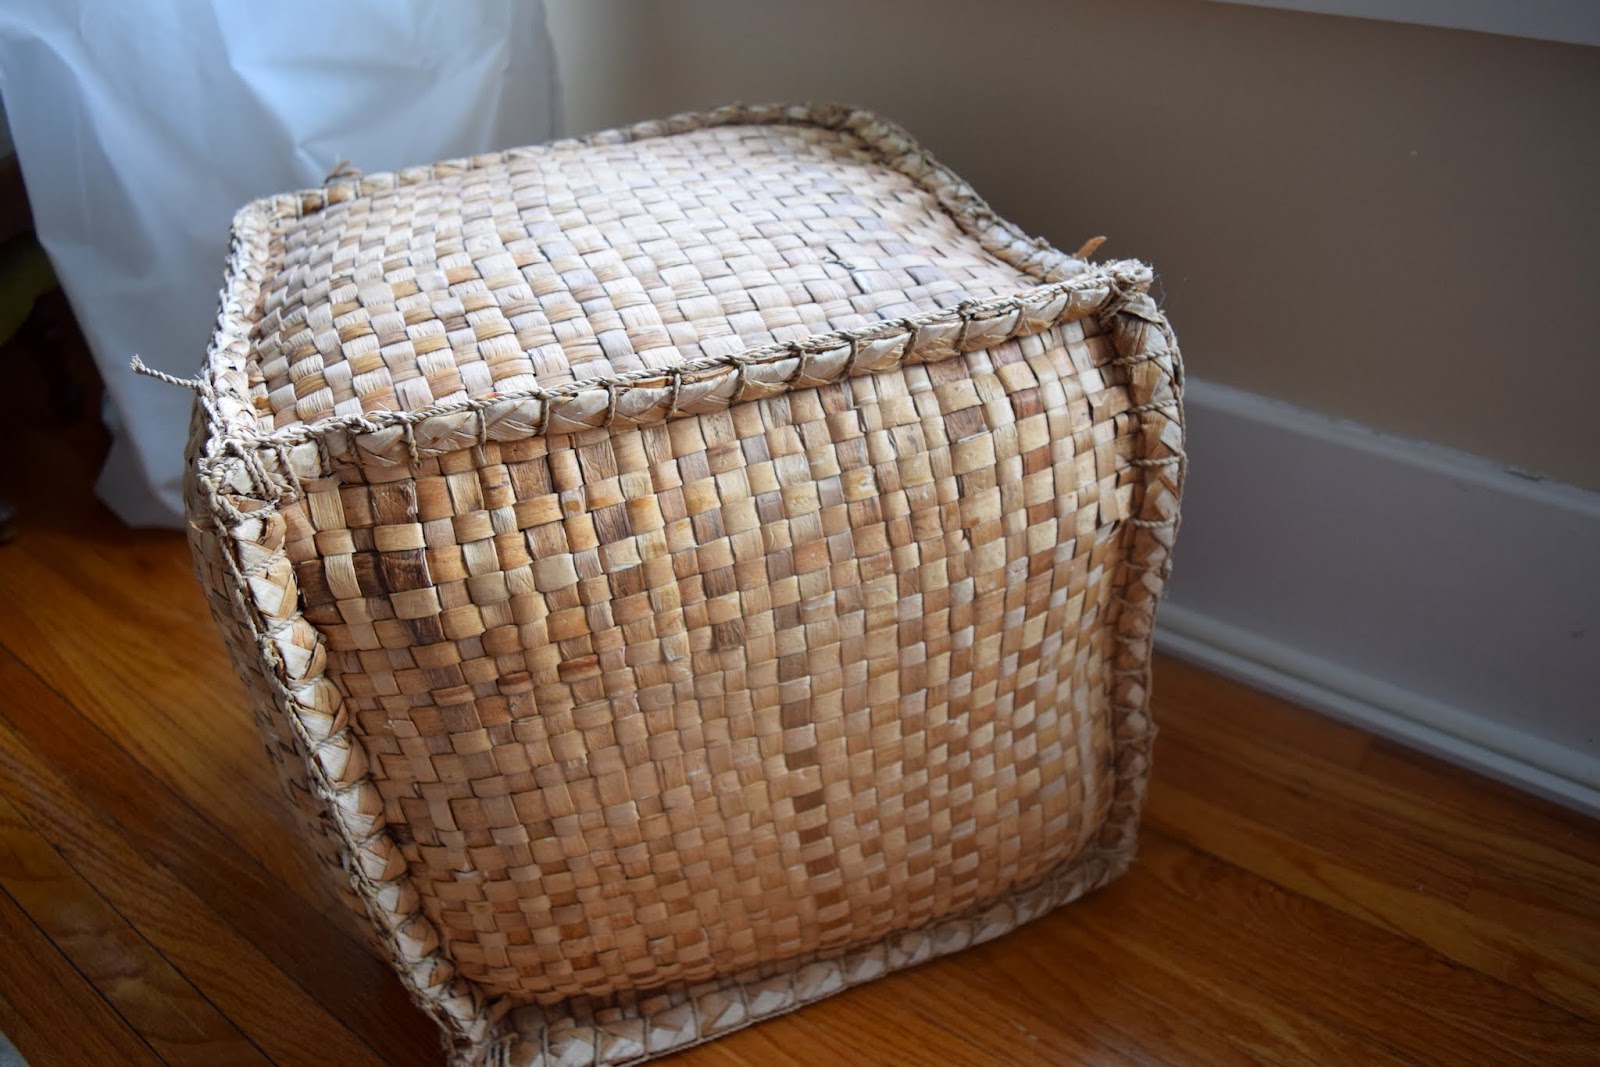
But I did take a picture of the $2 pouf that I got!


 It has a little damage on the bottom, but if it falls apart eventually I have the insert which I'm sure would cost a lot more than $2 if I was making one of my own. So $2 was a NO BRAINER for me. And I loved it the moment I saw it.

Our other finds, which I'll show you later, were an octagon rattan side table for $7, LOVE this one too. And an old cedar chest my husband eyed that will also double as a "window" seat and much needed extra storage in our bedroom for $30.  I also got a new table and chairs for my little girl's room. The one we've been using in her room is not my favorite and I've been planning on painting it and then selling it as soon as I found a better replacement. Well I think I found it.

 
The little chairs are what I really love about this set. Unfortunately I couldn't get the seller to go down much on this one, I paid $20. But I still feel like it was worth it. Much more character and LOVE than what $20 would get me from Ikea. And its all wood :)

Thursday, August 13, 2015

My next project


This was my first foot stool that I purchased. It was $5 at an estate sale pretty much around the corner from our house. And I bought it before we even owned this house, so yeah, its definitely TIME to make it over. I look at this and think "Why, oh why, have I not done this yet?!"


So today I took pics of it to show you guys and because this week has been, and will continue to be, so so busy I had to restrain myself from ripping that lovely green fabric OFF. Ughhh, it will be nice to say goodbye to that.

 I have always loved the little detail of the curved corners.
 This is a SOLID stool, and its pretty heavy too. And pretty old, who knows actually. I always try to ask the history on a piece when I'm buying it, but with this one they didn't know, except that for as long as they remembered their grandma, she always had it and used it. So now its time to get this little thing USED again.
 Actually it is occasionally used.
 When its not hiding beneath the MCM chair I reupholstered once. :) Actually I love that it fits just underneath it. Its great for when its not in use and our room doesn't allow for much room in this corner, so its nice to be able to tuck it away sometimes.

Tuesday, August 11, 2015

SOLD


So I meant to get a good picture of the desk and chair together, but I decided to sell it, so I cleared it all off and then I took my pics. for Craigslist. Sorry guys, dumb of me I know, I clearly wasn't thinking. But this was so exciting for me, my first real "sale" and I made a little $ to put into my next project!

I'm SO happy it went to a WONDERFUL home, for twin girls just starting middle school :) , but then I have to be honest, as soon as it was gone I was missing it BIG time.  And I really really turned out loving that chair.

Thankfully I have another desk out in the garage that I am so excited about. And I will show you soon.  Because of school starting this week, why is it so exhausting to prepare for this?...and family stopping in this weekend I haven't got any time for the projects I wanted to tackle this week. So it may be quiet around here for a little bit, just a heads up. But hopefully i'll be able to do a smaller project. Wish me luck, cross those fingers, and don't expect too much... ha ha.

Wednesday, August 5, 2015

Estate Sale and Consignment Shopping

This last weekend we went shopping.  The whole gang! So it wasn't exactly the best shopping, but I still had a lot of fun and my husband and kiddos were sweet enough to take me.

Actually my boys usually like going to the estate sales because there are usually some old toys that are pretty cheap so they know they might get an old board game or matchbox car out of it.  This time though because my garage is full of projects it was really just for fun or for small items only.

But of coarse I found some bigger items I wanted.
 Like this beautiful black lacquered chinoiserie chair!!!! I would change the seat cushion for sure, maybe paint it, but the black looks great if it works with your decor. I've been dreaming of this chair ever since I saw it, because yes... I didn't buy it. Once I refinish my campaign desk it would be perfect with it too.

Here are some images to show you what I mean.

source

source

source


And this beat up beauty, (needed a LOT of work, trust me) I haven't stopped thinking of it either.


I just shouldn't have looked at all, Now they are just haunting me, Maybe they'll still be there when I feel like I can spend more money on furniture?... HOPEFULLY.

I did get a few fun things though that I was excited about. A Fenton hobnail milk glass sugar dish, a globe for the boys that also lights up, and a big old brass lamp that right now is going in my daughter's room and needs an updated shade.

Her room is a work in progress, but here is a picture, plus you can see how we are using the message board so far.


I have so many plans for it and I even bought my paint but we haven't had the time to paint it yet. Hopefully soon, because family is coming to visit soon.

Tuesday, July 28, 2015

A chair for the desk

 A few weeks ago I painted our desk back in this post. I love it. We all really love it actually especially with the wax finish, feels so smooooooooth! Anyway, we needed a chair. Its a smaller desk and so your regular desk chairs or stuffed chairs wouldn't tuck underneath it. Well in our garage we've had this chair that we got from the same estate sale where we found the desk, meant to be?!  Maybe they we old friends and were used together before? Who knows, but I knew from the beginning what I wanted to do.

Because I'm itching to use the chalk paint powder again I almost veered from the plan, but I decided not too. I needed it to be quick and this old oak chair was really solid and still in great shape. It does still creak a bit when you sit in it, but that's part of its character.  

Speaking of character, back to the plan. I wanted to sand it down a bit to get most of that old stain and years of grit off of the wood so it felt new again. Also I wanted the wood to look more natural.

 Things went really well too, until that said, "years of grit and grime" started building up on the sander and started leaving these great presents behind. Next time i'll switch sandpaper pads more frequently, but thankfully just sanding it out with some elbow grease took care of it.

 I found some great fabric for the seat and wanted to get started on the seat while the weather cooled down a little outside, but unfortunately when I took the old petrified leather off of the seat I discovered there wasn't any padding left inside really at all. So it was back to the chair and the heat outside. Actually that days weather wasn't too bad, it was still hot, just not as hot and humid as it usually is.

So I first used some Re-store a Finish, just rubbed it all over it being careful not to leave it too wet, usually have to wipe it after putting it on.

 Then after letting it sit for 30 minutes, and getting dinner in the oven, I put Howard's Feed -n-wax on then wiped that off/buffed it 30 minutes later again.  It's hard to see the difference in these pictures, but believe me it is like the cherry on top! That feed-n-wax is definitely the "closer" here. (sorry we just started watching Suits, and we love it)

So for a few days this is how the chair looked tucked under the desk in our home. Then I was able to finally get to the store and buy some padding.


 And with a little trimming the foam I bought was the perfect size for the chair seat. And for the Nate Berkus fabric :)

 So I put it on the top and then flipped it over and placed it on my fabric where the "dots" lined up how I liked with the edge. Then I got out my upholstery tacks and hammer.
 Then I just secured my fabric how I wanted, checking the front along the way. One trick I learned in my upholstery class was that you don't have to nail them in all the way until you are happy with how tight or loose your fabric is.
 Then when you get it how you like you finish hammering them in, trim your fabric and then you are done.

Well you are done once you secure the seat back onto the chair frame. And that's when you hear the choir sing and you just have that happy feeling rush over you because you've actually made a sad old chair feel fresh and beautiful again. LOVE IT!  


 I'm so happy with how it all came together. I originally was going to choose the white with off-white dot fabric, because I thought it would look better with the desk, but then I didn't want any dirt to show since we have littles running and climbing around the house. And the blue ended up looking so much better than I imagined with the wood. the wood also ended up being a little darker than I expected, but I really love it. And I hope you guys do too.

The Before:

 AND

The After:


Hooray!!! We have a chair people! Soon I will show you how it looks with the desk.