Another week of the #oneroomchallenge has just flown by, and here we are already at week 4. What?!
So this is where I really start feeling the pressure, especially if things haven't gone as planned, because at this point you really only have a week and a half left - NOT 2 weeks, because in order to have the room done and ready to post, I have to have had time to take pictures of it ... in the daylight.
BUT guess what?! Today was the Wednesday update for the 20 professional blogger participants that are being sponsored, and for the first time ever Linda, from Calling it Home, who is the brains behind this awesome biannual challenge, did something she's never done before. Have you already heard? She extended the challenge by 1 week. So now I have a whole other week to get this mudroom exactly how I want it. Yay!!! If you'd like to read why click here.
So now the official finish line is Thursday, Nov 16th, not Nov. 9th like it would have been. This would be really awesome, actually it is awesome, but would be if I hadn't already miscalculated and thought that the 16th was the end date...whoops! I am not sure why this time I never mentally figured that out, I just somehow landed on the date I thought was the end and never questioned it. Man I would've had a rude awakening that last week that's for sure, so thank you Linda for helping me out!
So onto this week's update,
Oh and please if this is your first time stopping in click on these links to get caught up on the previous weeks.
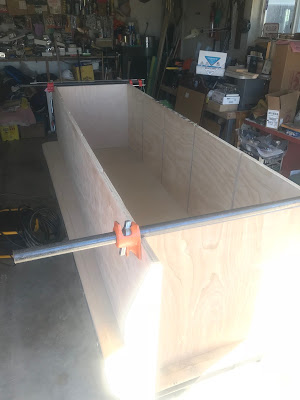
We started this week off strong and got our carcass built into the wall! If you follow me on Instagram then you've already seen the progress shot but here are a few more pictures.
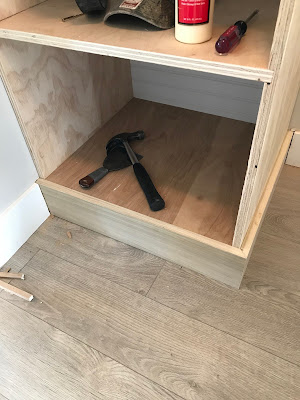
First we had to cut out the baseboards and then slide the piece into the corner of the room.
Then we put molding around the bottom to match up with the existing molding. And because of excellent planning our bottom shelf hit flush with the top of the molding, Yay! I'm learning so much from my Dad.
Then we also attached the entire unit into a stud at a few places, just to make sure it wasn't going to budge, and then added the top molding and the facing.
Thankfully my Dad, who is so talented, had fall break and was able to come help me 2 days in a row. So honestly because of him I have made great progress. Love you Dad!
Here is the shelving unit now built-in!
I love it you guys!!! I was so excited to get priming and then the next Dad my Dad stopped by again and got the bench up! Seriously so excited to start using this now!
Ignore the painter's tape mock-up, just trying to gauge if and where I'll put everything.
Some fun things for the room have also arrived.
The wallpaper, I mentioned the little snafu with it on my Instagram earlier this week and of which i'll expound upon in my next post. Also the hooks on top of a little preview of some of the bender board we've primed for the shiplap. The hooks are great, especially for the price, and don't stick out too far, and there is the rug looking better next to the wallpaper and wooden mirror, and ... I've been a little bummed about my baskets.
These two baskets are my top contenders, the black basket was my first choice, I love the leather handles most, especially against that black. And after the built-in is painted white it could bring in a nice contrast and a little drama, since I wanted too, but decided not to paint the built in a darker color. BUT it is a little small and the more expensive out of the two. (you cant tell from the picture, but it is not as deep as the blue basket therefore we wouldn't be maximizing our new and essential storage space.)
The blue felt basket is big enough but also now with the face plates on the built-in, is just a little taller than ideal. The handle is what is too tall here and there isn't much visual breathing space between the top of the basket and the face piece. You can see better in the pictures below. BUT the depth is much better and I love that its a soft and so the kids would not be scraping the bottom of the basket on the shelf each time they slid it out. And it is definitely more affordable, I will be buying 5 of these baskets.

So the question is, Which one? Do I try to train those leather handles down to make them more accessible? or just continue the search. The blue felt basket actually ended up looking SO much better in person than how it looks on the website too.
Hmmm... It also needs to be a really good sturdy basket that will hold up to a LOT of use, which I feel like both of these are. If you know of any great contenders I'd love to hear your suggestions.
So that's where I'm at, and thank you for stopping by! Hopefully you'll see more of a dramatic change in the room next week since I will finally be painting. The light fixture is also due to arrive any day and so hopefully that will be up as well.
Hope to see you next week and if you'd like to check out any of the other guest participants you can click here.


