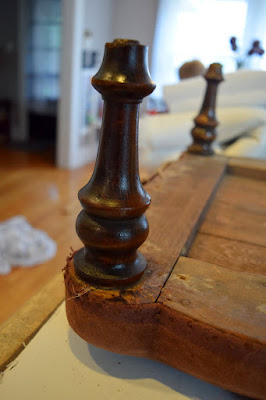
Here is the before, in case if you missed it.
More than a year ago I bought this faux sheepskin rug that I put in my daughters nursery in front of her crib, I loved it there, but secretly I also wanted to put it on this footstool. Now after I've seen them everywhere on the web I decided I was going to do it. And we got her a replacement rug too. :)
One fun part, and gross part, of reupholstering a piece of furniture is that when you are taking it apart, you get to peel off the layers of its life... if you are lucky :) A lot of people will just put their new fabric on top of the old. So this little guy had 3 different fabrics. But we'll go in reverse order, because that's the way I discovered it.
First the 70's green:
Then this brick red dazzler:
And then the original, needlepoint:
I think it also had trim going around the perimeter because there were rusty tacks all of the way around.
I'm not sure how old this piece was, but this fabric was pretty old and deteriorating, I gave it a good cleaning and then got started recovering.
Now normally I'd take this and the original padding off, but because the padding inside was still good, can you believe it? I was just going to add a little more. And I was so tired of pulling out little rusty tacks. This little stool that I thought would be so simple to recover took a while to take apart.
This is a before and after of just the Restore-a-Finish. After that's dry then you finish it off with the Feed-N-Wax. This is also what I did with the oak chair I recently redid. You can see it here.
Is anyone else EXHAUSTED from school starting? This year I have 2 in school, but one gets out earlier so my schedule has drastically changed.
After placing the batting that I used for my extra padding on the stool I flipped it upside down onto the back of my fabric that I was reupholstering, which was actually a rug that used to be in my daughters room in front of her crib.
Then I got my tools ready.
So with faux fur I've heard that if you cut it, it will just fall apart and continue too. So instead of cutting you have to rip it. Well because it was a rug I hoped it would be different, and thankfully after my "test" cut above, I knew I'd be fine.
If you are thinking of doing this the faux fur is actually really forgiving. I hardly used half as many tacks as I usually do for something this size and you really don't have to worry about if everything looks smooth and is pulled just right, you just go for what feels and looks right. Plus the tacks become pretty much invisible once the fur covers them.
It's ALIVE!
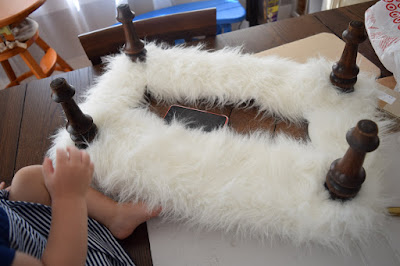
This was after I secured all four of the sides, before I did around the legs. Which is the only tricky thing about this upholstery project.
You will want to do some cutting to get rid of the extra bulk, and even though I could cut my fabric, after making a cut you need to make sure and pull off any of the extra fluff that is hanging on at the spot where you cut. But that's all of the "falling apart" that it does.
Then you just play around with it, making sure to still hold it tight so your corners wont be baggy, until you get it how you like and then secure it with a tack.
You can see my tack here.
And then here you can't! Like I said, most forgiving fabric I've ever reupholstered with.
And here is the bottom all done. And please don't mind my little helper. You gotta do what you gotta do to get anything done right?!
And sometimes that's letting her control the music on my phone and letting her hand me the tacks. Thankfully they aren't too sharp. By the way you could definitely use a staple gun for this project but I think the tacks are much easier to hide and are more flexible if you want to change anything you've done.
And playing peek-a-boo a million times under the table.
And then we were done! And ready to race off to the school to pick up her brother.
So what do you think? Too crazy? Look too much like a Halloween costume? Or is it Tres Chic?
To be honest now that its done I'm not sure how I feel. I love the texture it brings and the look, but I'm a little nervous of how it will "wear".


Love it! It looks great! And I'm proud of you for selling your beautiful desk and chair! That would be hard after all that work. Good for you!
ReplyDeleteThis is so cute! I'm actually getting ready to do the same thing to an old table haha Great minds! :)
ReplyDelete