Wednesday, October 28, 2015

One Room Challenge, week 4

Finally I have some progress to show you guys on the room that I chose to finish for the Calling it Home,Fall 2015 One Room Challenge. 
Click here for week 4.

I finally got to painting this room. Unfortunately I still have some touch up to do and I still need to paint the doors and the window sashes, but the walls, trim, baseboards, and the ceiling are pretty much finished.

This took me pretty much 2 whole days and part of a third. Clearing out the room, displacing our 1 yr old, prepping, painting, clean-up,    ... all of this while trying to do the normal day to day musts, shuttle, entertain and then shutting out the kids, leaving my husband to take care of the chaos, which was worse - because of the "shutting-out" thing, ALL of this just reconfirmed why I was putting this off.  And thank you Sarah for helping me for part of it, those were my most productive couple of hours! Oh and I can't forget to say thank you to my husband who rolled the ceiling for me and helped with a few patching areas and a HUGE thank you for taking care of the kids and putting them to bed without my help 2 nights in a row, love him.

 Okay so on with the show, here is a before shot after I cleared the room and shoved the bigger pieces to the center. Honestly I was not moving anything too big or heavy out of this room. Plus in this small house of ours there wasn't room for it anywhere anyway. So try to see through it all please :)


 I spent my first day just working on the trim, baseboards, and the ceiling, Tuesday I got to pour out this color. It is Secret Scent by BEHR at home depot. you can check back at week 2 to see my mood board with the paint swatch.

I know paint color looks so different when it is wet, but I loved this subtle pink. And the paint went on really great.
 After it was on the wall and started to dry the color began to change to more of the the pinkish purple color i was expecting but much much more bright than I anticipated. Here is a progress shot.
 Then here it is all done. I took these yesterday during the clean-up. It looks a lot more purple here and almost gray in some lighting.  Actually that's why I picked this color, I wanted a pink and a lavender and a gray, but of coarse I couldn't paint the wall all three colors. I was having the hardest time decided what direction to go and then I found this color. It kind of morphs depending on the lighting. all paint does actually, but this one is more obvious. Hopefully it will be fun. SO far I'm liking it more and more each time I go in the room.

 And once I have the curtains, pictures, rug(s), and bookshelves in here the color will hopefully melt into the background and not be as bold to those who first see it.  I want people to walk in and just love it, granted not many guys will feel that way, but you know what I mean.
 And yes you can totally tell that door hasn't been painted yet, really the "white" in this room was so sad and dingy its so refreshing now, actually it makes me want to walk around with a paint brush and fix all if the trim in this old house, too bad its not that simple.
 Another big thing I accomplished this week besides the usual brainstorming, shopping, second guessing, and stuff was putting together these bookshelves from IKEA. You can find out more about them in week 3's post. We'll be taking out the brown bookcase and putting the second Bitrade Ikea bookcase in its place. Also I think those may have to be painted as well, we'll see.

 And here is our cutie Loving her new wall color, she is also happy to have a room again I'm sure.

Now don't go anywhere,

One last thing, I definitely need some help with is the lamp shade on my big brass lamp. It's turned out to be really hard to find a replacement shade. I got this lamp at an estate sale and I immediately couldn't wait to ditch the dated pleated lamp shade. Honestly though if it wasn't pleated at this point I would keep it. But anyway, I thought I could pick up one at Target, but their biggest shade was not big enough, so back to what I need your help with.


Which Lamp Wore it Best?

#1 the original

#2 borrowed drum

#3 big and brand new

If I keep the borrowed shade, its from an old lamp we aren't using, I would either cover it with white fabric or paint it like this DIY here.

Oh and in case if its just as hard for you as it is for me, here are a couple side views to help you/ or confuse you more.


And here are my 2 cents, I'm getting used to the original, never thought i'd prefer it, but do the alternatives look funny? I do not like the pleats though and I don't see how I can change that on this shade. Also the borrowed drum I thought would be big enough but either I've, again, gotten used to the size of the original, or it is borderline too small. And then the IKEA Jara shade I think is the right size but its not quite the drum shape I was picturing in my mind for this lamp, also its big, however still not quite as wide as the original, when I brought it home I was like "THIS IS IT", but it has some issues fitting onto the lamp socket, hence the hand shots, so we'll need to get that figured out.

So that was really a lot to say about some old lamp shades but please I need help, I am in no way a professional here, maybe its obvious, but sometimes you just need an outsider who isn't so involved to state the obvious. I feel like when you are so involved you can become blind.

So again thanks for following along and wish me luck I have to have everything done in 2 weeks! And if you want to check out all of the incredibly talented bloggers participating check them out here, guest participants like me, and the Pro's.

So the rest of this week may not be very productive with Halloween and costumes that have yet to be finalized, gotta prioritize. BUT next week I will hopefully have a TON ready to show you, but what i'm really hoping gets done is:

paint touch-ups and doors
light fixture
clean up or paint? the window hardware and door knobs (this house is almost 100 years old it needs something)
make a decision on the the bookcases, paint? add height?


And if things go well hopefully you'll see these items tackled too:

get art work and frames pulled together
curtains and curtain rods done
baskets for storage


see you next week!

Thursday, October 22, 2015

One Room Challenge, week 3

Okay you guys this is the half way point! 3 more weeks left!!!!!

...and unfortunately the room looks the same. 

Well except that it still has a mattress on the floor that my wonderful MOM slept on all this last week. She flew from far away to spend a whole week with us and we loved every minute of it, and thankfully she not only put up with me and my One Room Challenge talk, but she also helped me. We shopped and shopped and shopped and we even drove for 3 hours to get to the nearest IKEA to get a few things as well.

So I mentioned in my last post that I needed some bookshelves. Well I don't have much of a budget and I wanted some height so this is what we went with.


I have a plan to make it a little taller. What I really want to do though is probably going to be too much, but we'll see. I've got a back up plan that's pennies, so its making the more expensive idea hard to pitch to my husband. 


I mean hairpin legs are definitely my new favorite right now! photo source

We actually got 2 of these bookshelves and I'm going to have them flanking one of the windows, still working out furniture placement.  And i'm trying to decide if I should keep them white or paint them a coordinating color? Too many decisions!!!!!

We also looked at rugs, artwork, and some curtain options. Hopefully next week I'll have a LOT more progress to show you, This week we are finally painting the room, but for now that's all I have. Thanks for sticking with me. 


Thursday, October 15, 2015

One Room Challenge, week 2

The plan:


So this last week I realized that this challenge will actually be a 5 week challenge because when I posted the room I wanted to make over that WAS week 1, and it was over. So now this last week we decided to travel 14 hours away for a surprise birthday party for both of parents. It was SO much fun and definitely worth it, but it also put me behind another week.

So for today I only have a mood board that I created for you, so you an see a little of where i'm going with this. Sorry folks.

Hopefully next week I'll have some progress to show you. Thankfully my One Room Challenge is more of a "refresh/finish". Because starting from scratch would've been much harder to complete by the deadline, however 4 weeks is still fast for all of the things I want to achieve in this room.

Here is my Tackle List:

paint
windows
ceiling fixture (right now its your standard boob light)
gallery wall
art work above her bed
bookshelves (find some ASAP)
larger rug  (layer underneath- can I pull this off on my budget? )
table and chairs refresh (paint?)
lamp (need an updated shade that fits)

So that doesn't look do bad right? Hopefully it will be a breeze...who am I kidding though, this is going to be a lot of HARD WORK, wish me luck and pray that my kids don't get neglected in the mix of it all.

* I will most definitely give credit to the awesome inspiration I drummed up for this mood board, but now my Mom is in town visiting today so I will update it later, thanks for understanding.
And guys, making a mood board is really fun and also takes WAY more time than you expect, just so you know.

Also please check out the other participants over at Calling it Home, there is SO much to see!

Thursday, October 8, 2015

My ONE ROOM CHALLENGE, Week 1

It's that time of year! Time for the Fall Calling it Home, One Room Challenge 2015. If you haven't ever heard of this you DEFINITELY need to check it out and follow along. Just click on that link above. :) It is so fun and full of SO much inspiration. You really don't want to miss it. I've never participated before but I have always dreamed of doing it. So this year I decided to be brave, and participate as a guest and link up on Thursdays, the day after the official participants, the design bloggers.

So I have six weeks starting today... please cross your fingers for me! 
I'm going to have to really sit down and get a master plan going so that I might be able to stick to a schedule amidst all of the mommying, and I honestly don't have a budget. And I mean that in a NO $$$, not unlimited amounts of money, kind of way.  I will hopefully be able to sweet talk the money maker though into maybe throwing a few dollars my way. Otherwise this is going to get interesting.  Seriously though, I really want to do this, I've been planning on finishing this room for almost 2 years now, so yeah, its time. 

And if I have to use what I've got, or can find on trash day than so be it. 

So here is a little info about the room I chose to finish. It's my baby girl's nursery.


 Although now she is 1 1/2 years old. So things have already changed. But I wanted to show you where I truly started from.

This dresser is also in the room, it is on the wall opposite the window in the above picture. And I love it! It is definitely staying in the room, despite my husbands little hints saying it should really be in our room... well I guess we'll see at the end of the 6 weeks what happens  

But since my daughter isn't a baby anymore (how does this happen so fast?!!!) now the room looks like this. And you guys this is REALLY how it looks. I'm apologizing for the mess, but you can see how this room really does need some help.


 A lot of things have just been "put" in the room. I thought, "I'll just set it here and figure it out later", well "later" hasn't happened yet. Also, unfortunately her room has become a little bit of a storage half-way house. Notice the baby carrier behind the door, it will be going up into the attic soon.


 There is one tiny part of the room that I can say that I designed, although this isn't how I really want it, the dresser/changing table. This will hopefully give you a glimpse into how I really want this room to feel. Bright, colorful, functional and fun. You can read more about this lamp here, and the message board here. Thanks for following along, and wish me luck!


Thursday, September 24, 2015

Painting zebras

This little table and chairs have been screaming for a makeover since the moment I saw them.
I just can't believe I waited this long. By the way, let me introduce you to Tonka, our feline friend. He parked himself on that chair the moment I sat it there and wouldn't move, well I guess I could've moved him, but I was too lazy.

 Noah's Ark sure had its heyday a few... decades ago, and i'm sure some people are still using this theme in their nursery's but hopefully not like this.
After I picked this up at a garage sale 2 years ago, seriously you guys I have so many projects to do, I wanted to paint it for sure, but I didn't know what to do about the picture part.  It's actually just a picture that has been adhered to the top then painted around the edge. I wasn't sure if I should try peeling it off or sanding it off. Then when I discovered B.B. Frosch's chalk paint powder when I painted the desk, I knew that was my solution to this table and chairs.
So I ran to Home Depot and picked up a paint sample can of a blue that I thought could go well in a boys or girls room, since we have both in our house.
 Goodbye Zebras, Elephants, and Tigers.
Can't wait to show you how it turned out.

Friday, September 18, 2015

Our Pallet Couch Progress


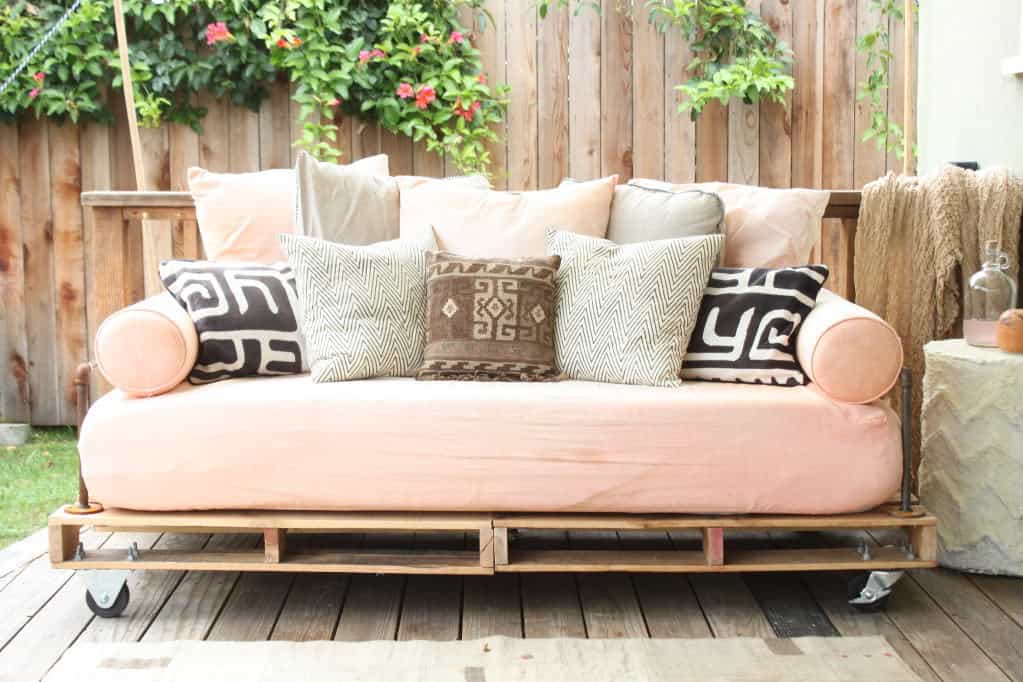
A few weeks ago I posted this picture on Instagram, 7 bed pillows, and didn't explain what I was using them for. Well its one of my "secrets of the trade". It's by far THE cheapest way I have found to stuff a HUGE pillow on a shoestring budget. Not the best, I'd LOVE a down pillow really, and you have to be careful and smooth everything out when you are stuffing so you don't have lumps.


So $30 to stuff 5 pillows that were 25" by 25" instead of paying $30 for one pillow insert almost that size was definitely worth it. By the way, I had to go back and buy 3 more pillows. So 10 pillows at $3 each comes out to $30.


Now remember this is still a work in progress. The plan is to go buy more of my fabric and sew a bolster pillow for each end to act like an "arm" to the couch. And to finish covers to go over those pink and green pillows that are basically stand by's right now.


So maybe this black and white image will help you visualize the end result a little better.
Really its also to minimize the bright, actually very chic... coffee table we are using right now, our boys dinosaur train table with a volcano in the center. :) These are the problems you have when having a basement man cave + play room for the kids. 

  
Actually I should probably update you really quick on how this whole couch came to be.
So the anderson estate is a very old house as you can see, and with that comes wonderful character, maybe some livable quirks and also some horrible challenges.  Well one of those challenges is the basement. It isn't very big, but we think its big enough to fulfill our needs: needs to be a play room, man cave, entertaining space, and a guest room. The hardest part though is that the stairway to get down is short (as in even I have to duck at one point) and skinnier than normal. If you want to see a little of that, and what it looked like when we moved in you can click here.  

So we quickly found out not many furniture items could even fit down the stairs unless you could dismantle it first. And not many couches can do that. Then we decided okay we just have to go to Ikea and buy one and then put it together in the basement. Well there was a problem with that. The nearest Ikea was more than 3 hours away, we had a budget for this said couch (driving that far and back costs money, gas, snacks, time, etc...)  and how would we fit all of the boxes and cushions in our vehicle plus us, plus our children and their car seats. So that option was pretty much off the table pretty quick.

So then we started talking about doing 2 daybeds, then that would help with our guestroom qualification.

So one day on Pinterest I saw this pallet couch.

prudent baby
Don't you just love it?! Well we ended up using a different kind of pallet, but we figured out a way to "re-create" it and we got started.


This is my hardworking husband who doesn't normally do projects like this completing the first one.
This was last year though, so yeah we take awhile sometimes on projects. His motivation was football season. And then funny how again this year the motivation for me was football season, the reason our family visited, to get the sewing done/started.


We put taller wheels on ours, I wanted it higher, we are tall people over here. and I also wanted it closer to the expected height of a couch. We also put swivel wheels so we could move them around more easily and they also lock so the kids can't move them around. They actually turned out pretty heavy for a child to move anyway.

So there was a little back story. Actually if you guys are interested in more details on what we bought and how we did it, I'm hopefully doing another post with that inf when its all finished, but knowing you'd be interested might help me be more motivated to get it done faster.


And just so you can have a better look at the whole thing here you go. And yes some day that coffee table will change, but for now this is real life.


Wednesday, September 9, 2015

New pillows for the porch


A few years ago I made the multicolored pillows in the picture above for our screened-in porch with the cheapest outdoor fabric I could find. Actually with coupons and their close-out sale, I only paid $5 for the fabric and filler for 2 pillows.  They were never really my favorite but they served their purpose. But we've always needed more so a few weeks ago I thought I'd grab some more outdoor fabric from Joanne's to help with comfort and asthetics.  


We also had family coming to visit and I wanted it to be ready in time, luckily this project was a fast one. All I did was cut 2 long rectangles, fold them each in half with the right sides facing in and then sewed around them leaving a hole that was big enough for my hand to stuff it. Then after I stuffed it, I sewed it shut while watching Suits. (Where we are at right now Louis Litt is quickly becoming my favorite character, who knew:) )